Users
By right clicking on the user objects, you can do the following operations
Edit
Rename
Change password
Move
Enable / Disable
Logon Hours
PSO
Password Never Expires On/Off
Unlock
Delete
on selected user object. You can also drag/drop from the right tree to the left tree individually or collectively to a different organizational unit.
Add User
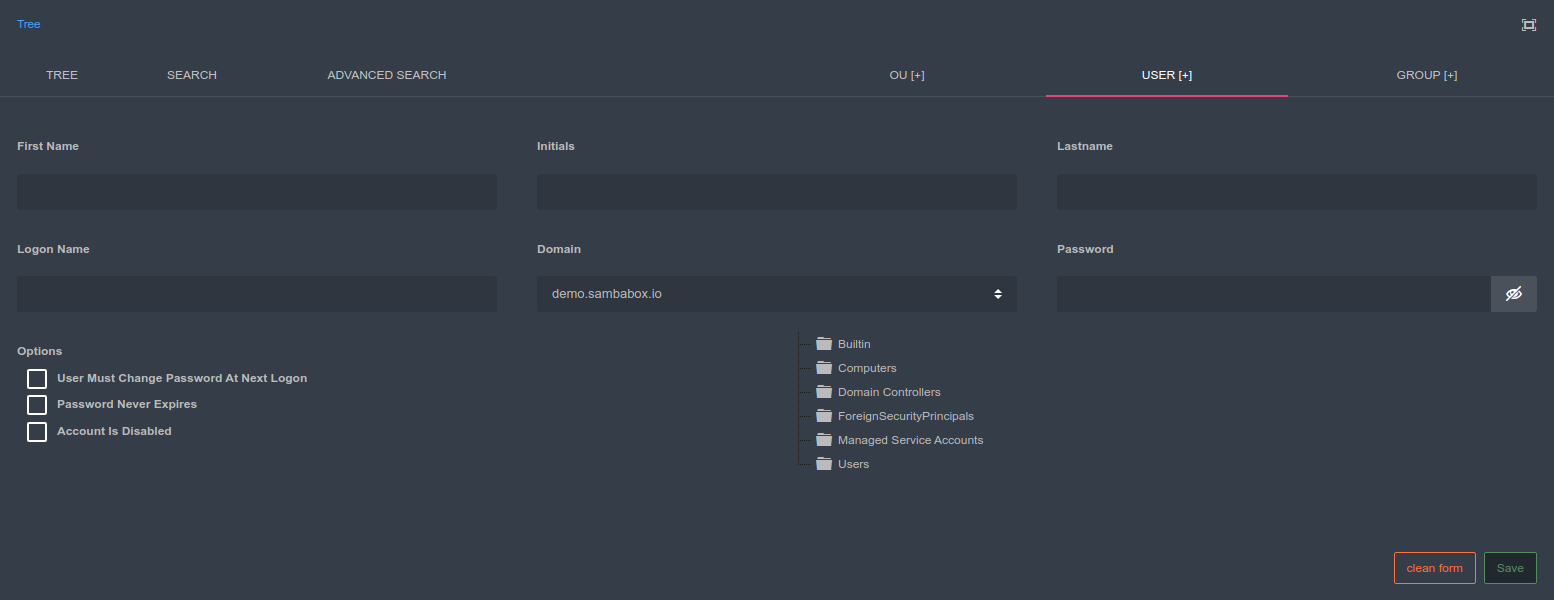
To add a user to an organization unit, you can right click to the related OU and select Add User or use USER [+] tab on the organization unit.
You can select the organization unit to which the user will be added in the enterprise directory tree structure.
Warning
While defining a user in the directory structure;
Name
Surname
Login Name
Password
fields must be filled.
Edit User
When you right-click a user object and select Edit, the edit form containing all of the user’s information opens. The left side of the form contains identity and contact information, while the right side contains account settings, the organizational unit and group memberships.
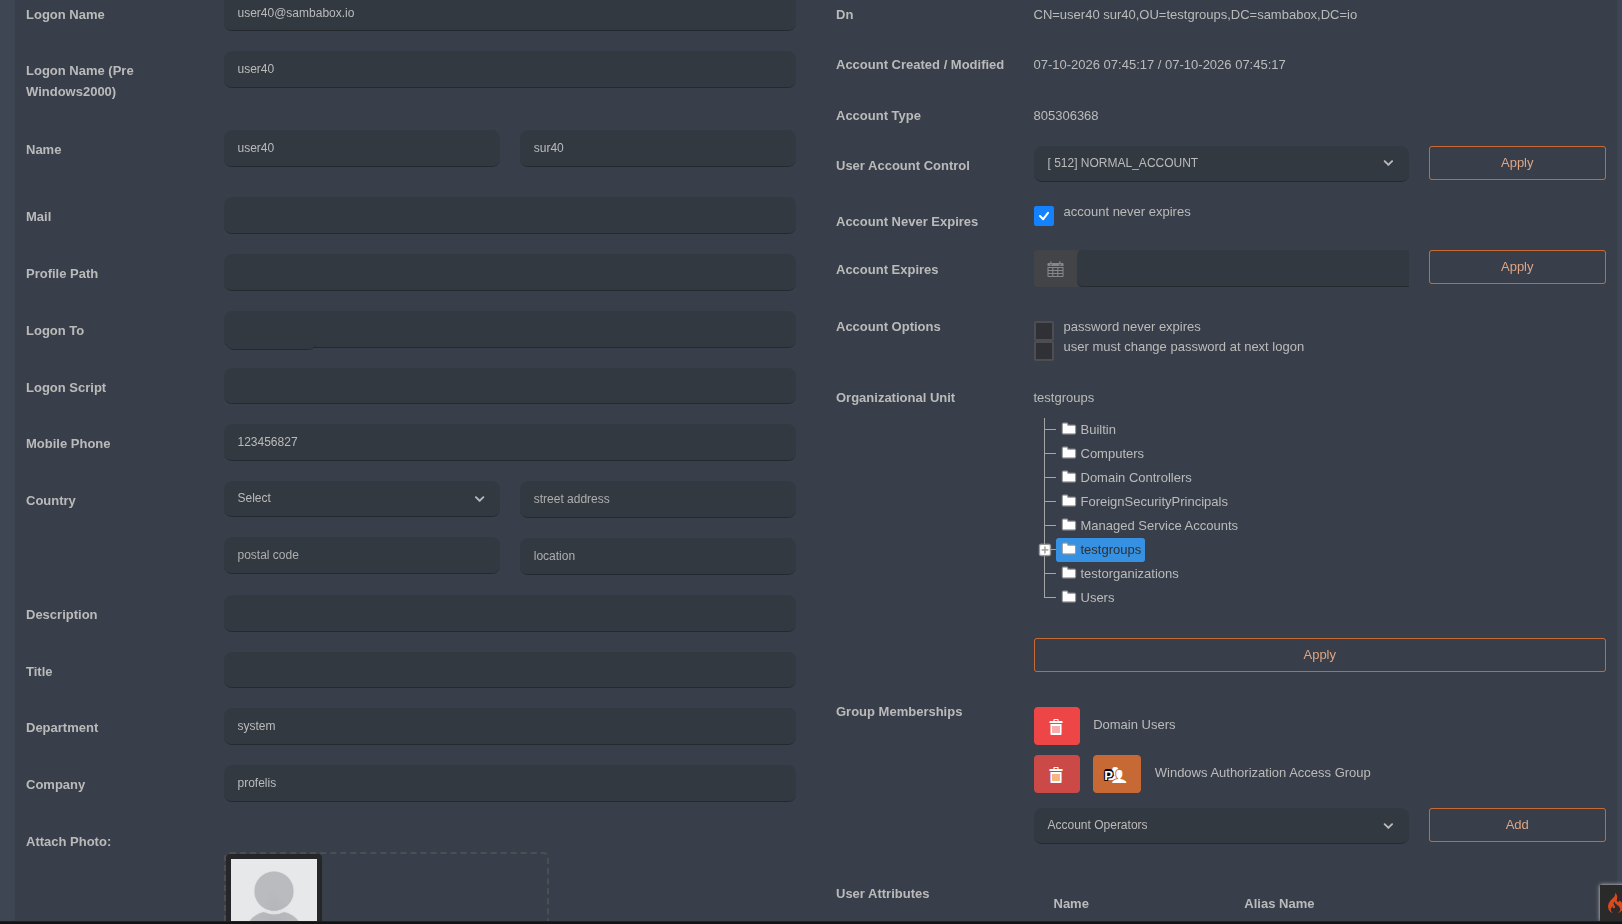
The following fields deserve special attention:
Profile Path (profilePath): The network path where the user’s roaming profile is stored, e.g.
\\server\profiles\%username%. When set, the user’s profile is loaded from this location on every computer the user logs on to.Logon To (userWorkstations): Restricts the computers the user can log on to. Enter computer names separated by commas. If left empty, the user can log on to all computers in the domain.
Logon Script (scriptPath): The name of the script that runs when the user logs on (e.g.
logon.bat). The path is relative to theNETLOGONshare on the domain controller.User Account Control (userAccountControl): The flag value that defines the account type and state. Select a value such as
[512] NORMAL_ACCOUNTor[514] ACCOUNTDISABLEfrom the list and click Apply to change the account’s behavior.User Attributes: Allows attributes that are defined in the schema, but not shown on the form by default, to be added to the form. Enter the schema attribute name in Name and the label to display in Alias Name, then click add; the field will appear on the edit form of all users. For defining custom attributes, see Custom Attributes.
Note
Changes are saved when you click the Apply button next to the related field.